


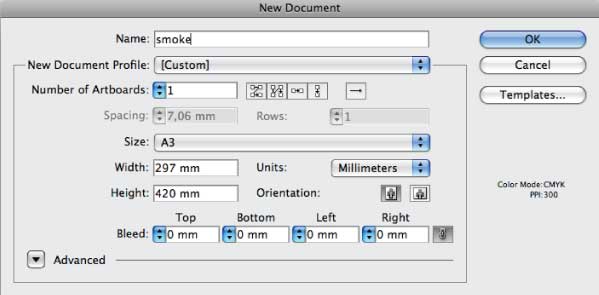
Step 1
Create a new document (Command + N) for print in A3 (297mm by 420mm).
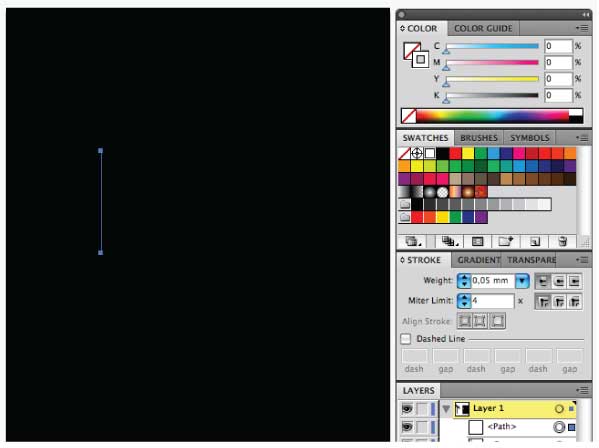
Step 2
Make a rectangle with the Rectangle Tool (M) that covers the whole artboard and make it black. While the rectangle is selected go to Object > Lock > Selection (Command + 2), which will lock the object so that you can't select it.
Take your Pen Tool (P) and make a vertical stroke (click to make a start point, then click somewhere over or under the start point while holding Shift to make a vertical stroke). Make the stroke white and the fill blank. Set the weight of the stroke to 0,05mm.
If your units are set to something else, like points or inches, make sure that you type in "mm" behind 0,05, or hit Command + K. Choose units and display performance from the drop-down menu and change the units to millimeters.
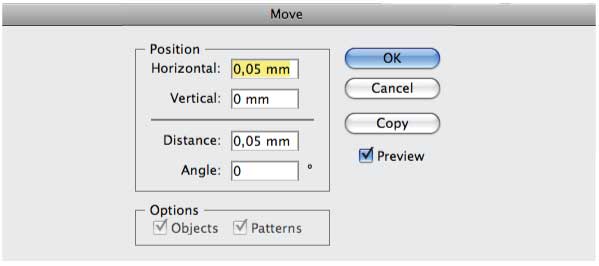
Step 3
While your stroke is selected grab the Selection Tool (V), then hit enter and type in 0,05mm for horizontal and 0 for vertical. Click copy and hold Command + D (Object > Transform > Transform Again) for around 20sec, which will perform the Tranform Again command multiple times.
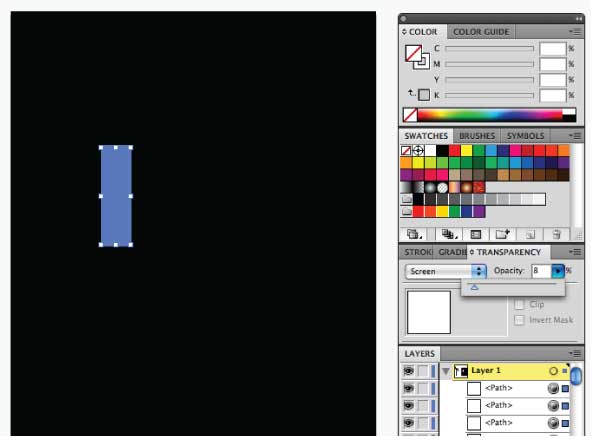
Step 4
While all of your strokes are selected, set the blend mode to Screen and Opacity to 8. Then group it (Command + G).
Step 5
Take your Pen Tool (P) and draw a shape that looks something like that shown below.
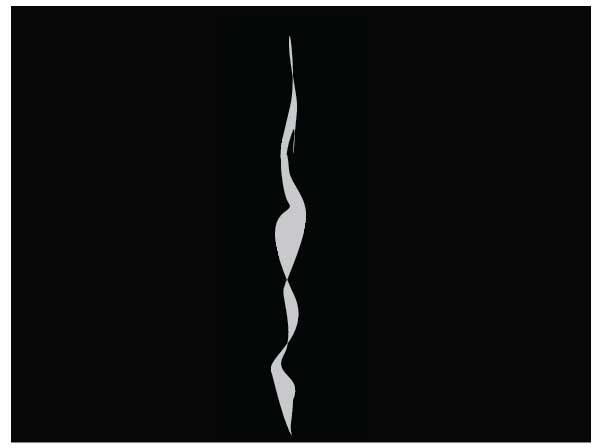
Step 6
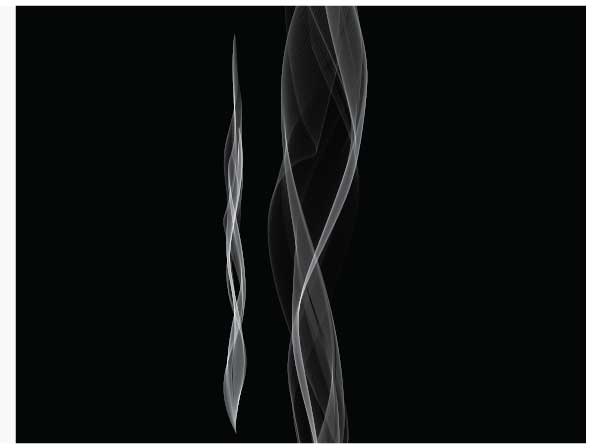
Now for the magical step! Make sure that the shape you just made is on the top and click it, then hit Command + Shift + Right Bracket key (Object > Arrange > Bring to Front). Select the path and the strokes and go to Object > Envelope Distort > Make With Top Object (Command + Alt + C). Check that the Blend Fidelity is set to 100 (Object > Envelope Distort > Envelope Options, there you should set the Fidelity to 100).
Now that's pretty cool, but if you take a closer look, you will see that the strokes are pretty clear. If you do not intend to make a stroke out of this you can fix it by clicking Effect > Blur > Gaussian Blur... and type in 7.0px, but since we are going to make a stroke out of it, we'll do that later (shapes you want to turn into strokes can't have effects like this one added).
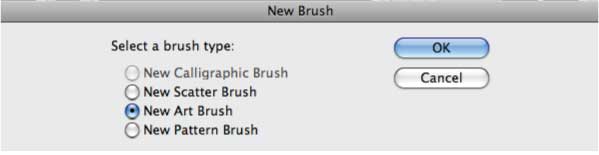
Step 7
Now drag your smoke into the brushes panel. If you can't see it then hit F5. Check the New Art Brush and hit OK.
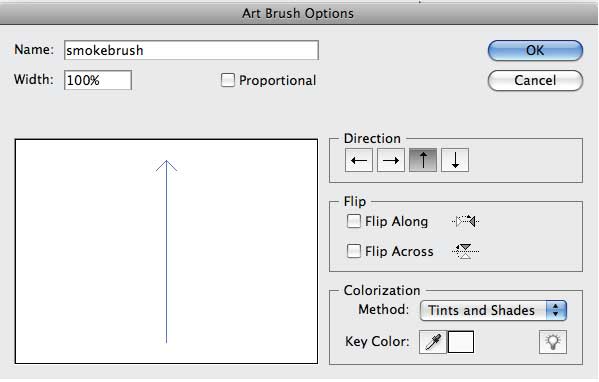
Step 8
Name your brush whatever you want to, set the Direction to Up, and Method to Tints and Shades, then hit OK.
Step 9
Now you have your brush, but do you have something to use it for? If yes, remember to chose Effect > Blur > Gaussian Blur... and type in 0.7px when you have assembled your brush. If no, continue reading.
Take you Pencil Tool (N) and draw some letters, one letter at a time. Group them, add the stroke and set the stroke weight to 0,5pt.
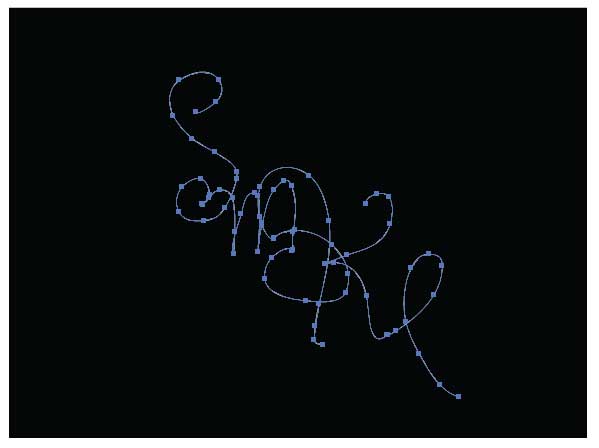
Step 10
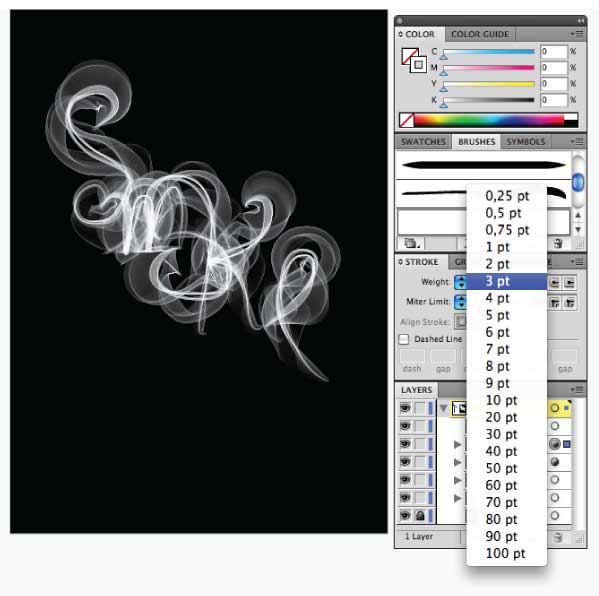
Copy your smoky letters (Command + C) and paste them behind (Command + B). Set the stroke weight to 3 pt. Now go to Effect > Blur > Gaussian Blur... and type in 7 px.
Yes, this is a Photoshop effect, so it will rasterize, but if you hit Command + K and check the Scale Strokes and Effects, then you'll be fine when you want to scale it.
Final Image
I hope you learned something new, and that it will come in use sometime, if it does, I would love to see what you make out of it.

0 Response to "How to Create Smoky Brushes and Type In Illustrator CS4"
Post a Comment