

In this beginner tutorial I will show you different ways to use layer masks to add some extra flare to your photos. First I will show you how to add color to a black and white image, then I will show you how to add depth of field to an image by just using blurring and a layer mask.
Before you begin download the images for the tutorial
Tip 1: Black and white Photo with Color
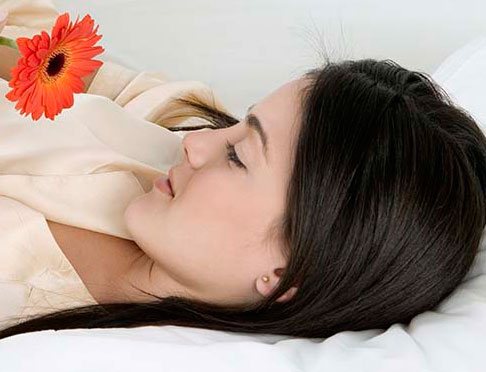
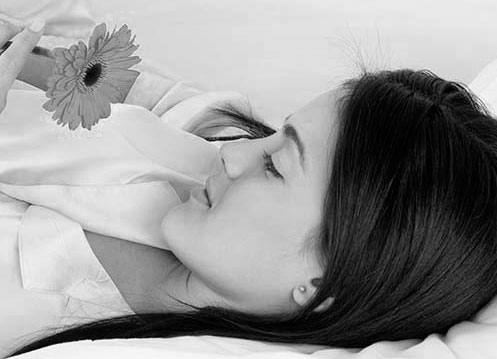
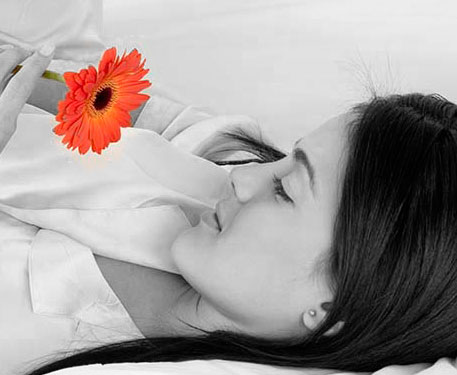
After you download the picture of the lady laying on a bed with a flower, open it in photoshop.
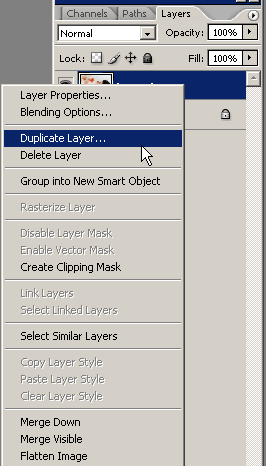
Duplicate the image
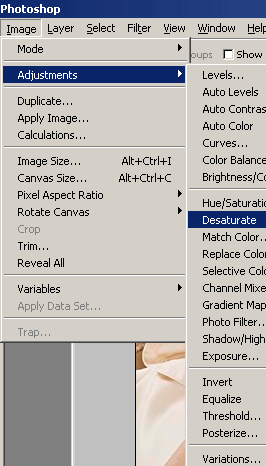
Now make the top image black and white by using the keyboard shortcut ctrl+shift+u. Or you can go image>>adjustments>>desaturate on your top photoshop menu
Now your image should be black and white and you should have a layer underneath it that is still color
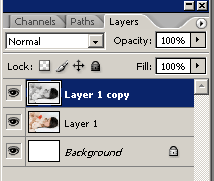
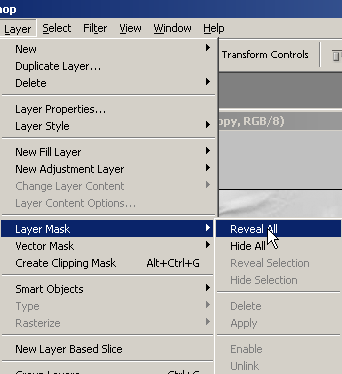
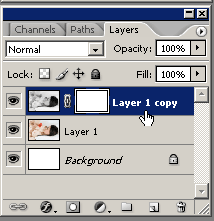
Its time to add the layer mask to the black and white layer. So you can click the layer mask icon at the bottom of your layer’s palette or you can go to layer>>layer mask>>reveal all.

Once you do that your layer should look like this
Make sure your foreground and background colors are set to default (black and white)
Get a soft brush around 13px and start painting the flower to make the color show through.
For this to work make sure your foreground color is black.
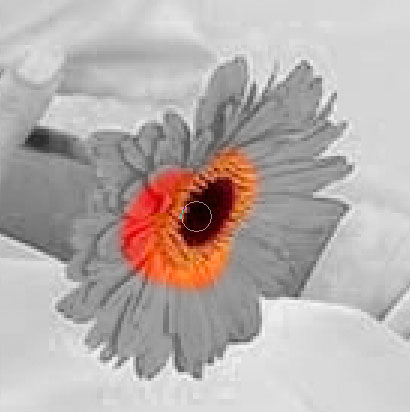
I zoomed in about 300% with the keyboard shortcut ctrl+ and zoom out with ctrl-.
What if you go over the edges? Well its simple hit “X” on your keyboard to make your foreground color white and paint back the parts you went over.
That is how easy it is to take a color photo, make it black and white, then bring the color back to make your image look professional.
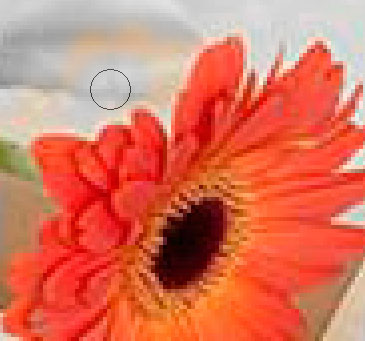
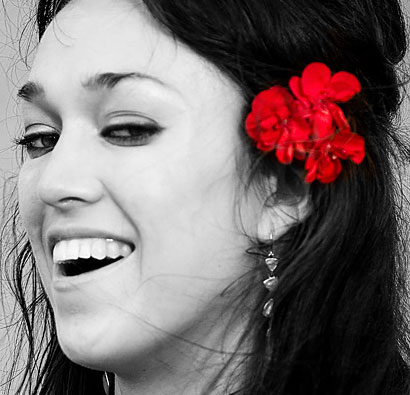
Here is another example
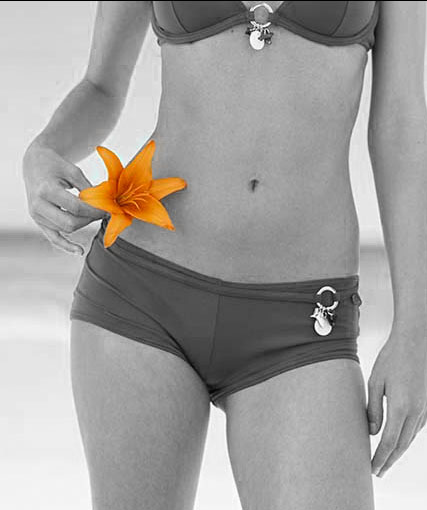
And another example
You can also do the same thing with someone’s eyes if you want them to stand out in a black and white image to add a neat effect. Experiment with this method and
see what you can get!
Tip 2: Adding Depth of Field to an Image
In this next tip I will show you how to easily add depth of field to an image. If you don’t know depth of field is what you see in images when the focus is on one or multiple objects while the rest of the objects in the image are blurred out.
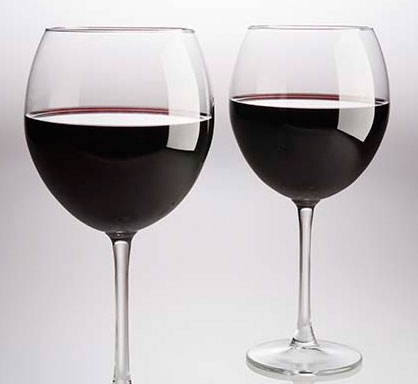
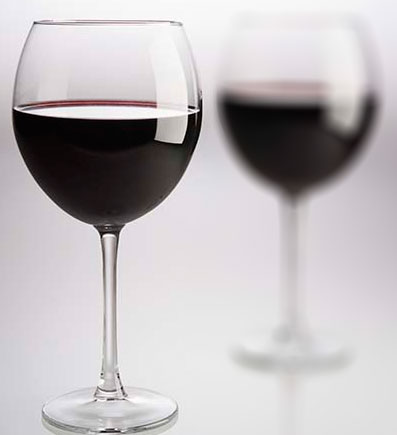
SO open up the wine picture you downloaded previously and duplicate the layer like we did with the other image.
Next we need to add some blur to the image you just duplicated.
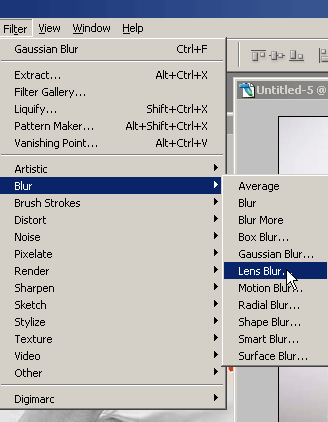
You can use about any of the blurs but I like the result the best from the lens blur filter.
So go to filter>>blur>>lens blur
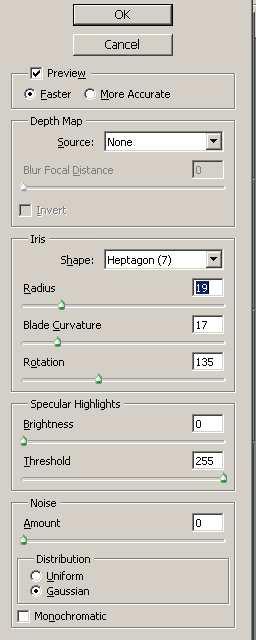
Use these settings or experiment with your own
Now you know what to do, add your layer mask to the top layer and paint away the blur you don’t want in the image. So I will erase the blur from the closest glass so the glass further back will be out of focus.

Do you see the difference on how your eyes see the image now?
Here is what mine looks like
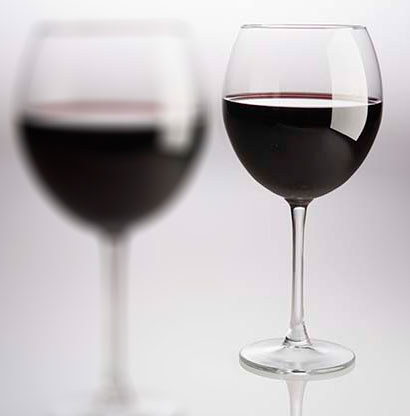
You can also reverse that and put the blur on the closest glass
That is all for this quick and simple tutorial. I hope this shows you some easy techniques you can use in photoshop to achieve some professional results!

0 Response to "Photoshop Tip: Using Layer Masks"
Post a Comment